
LOW COST OPTICAL DIGITISING
| MENU | |
| Home | |
| Features | |
| Downloads | |
| About Rigs | |
| Purchasing | |
| How It Works | |
| Screen Shots | |
| Contact Us | |
| TUTORIALS | |
| Tutorial 1 | |
| Tutorial 2 | |
| Tutorial 3 | |
| Tutorial 4 | |
| Tutorial 5 | |
| Tutorial 6 | |
| Tutorial 7 |
Tutorial 5
This tutorial assumes that the user has already done tutorial1. This project is available on the downloads page.
The objective of this tutorial is to show how to use mirrors.
Translations and Mirrors
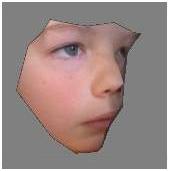
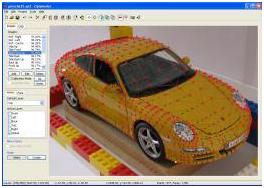
Open up the Tutorial5.op2 project file. This project contains all of the images, points and faces of a model porsche.
Creating a Half project
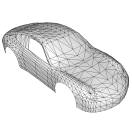
The Tutorial5 project contains a complete mesh. The first step will be to remove half of the model and apply a mirror.
Select the Front image in the Images Tab.
Zoom and Scroll until you can see the whole model.
In the Face tab, tick all of the Materials as being active. Dont forget to scroll down if you cant see them all.
With all of the points and faces active, you can see why layers and materials are used to filter out unwanted points and faces.
Click on the CAD tab, next to the Images Tab.
In the drop down View list, choose X-Axis.
The front view of the model should be visible as shown below. Zooming and scrolling may be required to see the whole model.
Click on the Vertex Tab to select Vertex mode. We want to be in select mode, so press the Select button at the bottom of the tool pane if its not already selected.
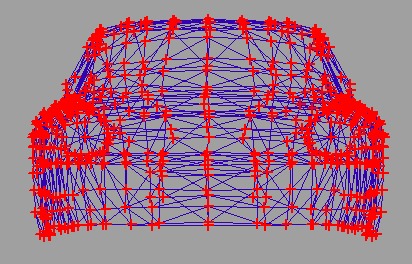
Drag out a selection box around the points shown below.
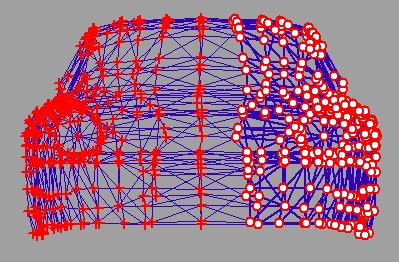
Now press the Delete key to delete these points and faces.
The right hand side of the model should disappear leaving a half model.
Setting the Mirror
On the Project menu, select Translations. You can alternatively use the Translations button on the toolbar.
Set the mirror to Z Plane as shown below. Origin offset and Mirror buffer have already been set.
Mirror Buffer is a tolerance band where points within this value of the origin are not mirrored and are treated as being a seam point for the mirror. Faces that join at the seam use these seam points
The reference points for the lego rig used on this model are all relative to one corner of the rig. The Origin Offset shown below, maps the new origin to the old one. The new origin is around the lower centre of the car and this is where the mirror will apply.
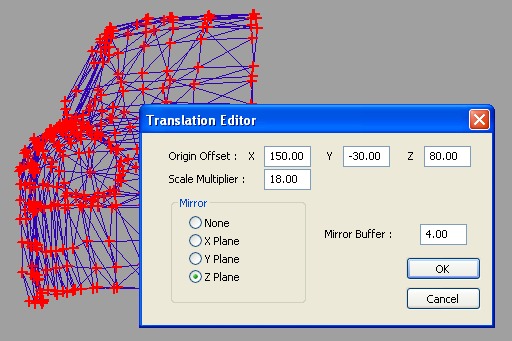
Press the OK button to close this form.
The mirror faces will change colour. This colour can be set in the Project Properties screen.
Toggle the Show Mirror Points checkbox in the Tool Pane to see how the mirror points are shown. Any changes to the measured points and faces are reflected in the mirror.
Exporting
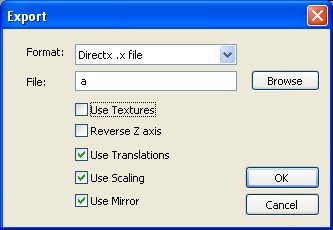
Click on the Export button on the toolbar.
In the export form, set the check boxes as shown. Note the Use Mirror checkbox.
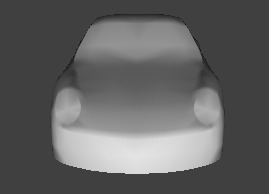
The output should look something like this. If the Use Mirror checkbox is not selected, then only half of the model will be exported.
Dont forget to save this project as something like Tutorial5a.op2 to keep the original tutorial project intact.