
LOW COST OPTICAL DIGITISING
| MENU | |
| Home | |
| Features | |
| Downloads | |
| About Rigs | |
| Purchasing | |
| How It Works | |
| Screen Shots | |
| Contact Us | |
| TUTORIALS | |
| Tutorial 1 | |
| Tutorial 2 | |
| Tutorial 3 | |
| Tutorial 4 | |
| Tutorial 5 | |
| Tutorial 6 | |
| Tutorial 7 |
Tutorial 7
Creating a Camera
This project is available on the downloads page. On the Tools menu, click on Camera Setup / Calibration. This loads up the camera editor, which should like the following screen:
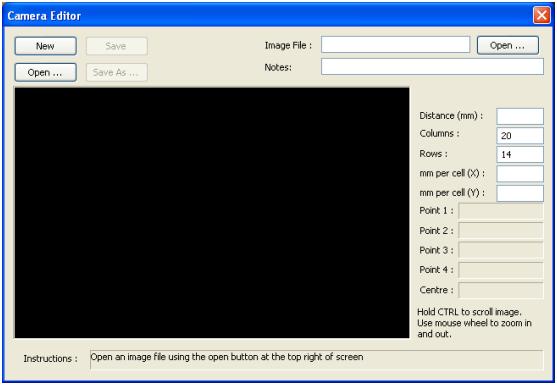
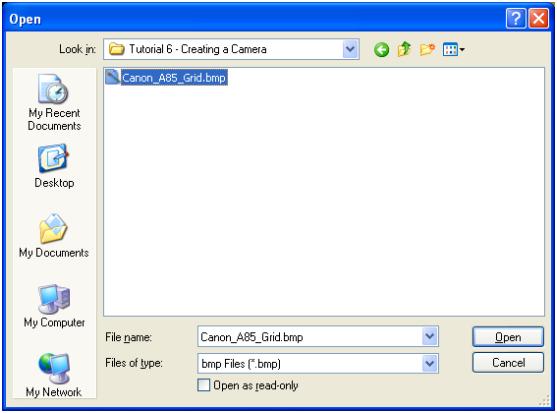
Click on the Open button on the top right of this form and select the BMP file as shown below.
The main image area of the editor should now show a grid image.
In the Notes field, type Canon A85 No Zoom. The distortion characteristics of cameras various with zoom. This particular image was taken with no zoom.
In the Distance (mm) field, type 243. This was the measured distance from the focal point of the camera to the printed page when the image was taken.
Leave the Columns and Rows fields as they are at 20 and 14.
In the mm per cell (X) field, enter 12.055
In the mm per cell (Y) field, enter 12.064. The cells in the grid where slightly taller than they are wide. This measurement was taken from the original printed page. The page was printed on a HP LaserJet 1022.
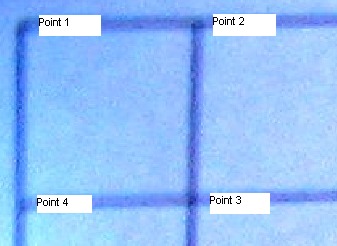
Now click with the left mouse button on the corners of the grid as shown below. The fields Point 1 to Point 4 will be automatically filled out as you click. You wont need to click exactly on the corners as the system will automatically lock on to the nearest corner.
A window should pop up while the system searches for all of the other corners. This should only take a few seconds.
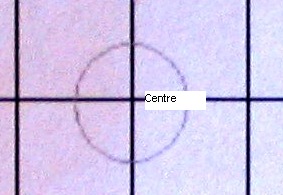
The next step is to mark the centre of the screen. Use the mousewheel to zoom in and out of the image and hold the CTRL key while moving the mouse to scroll the image. By whatever means, find the centre circle of the image as shown below and click on the crossover points of the lines in the centre as marked below.
The screen should now look something like this :
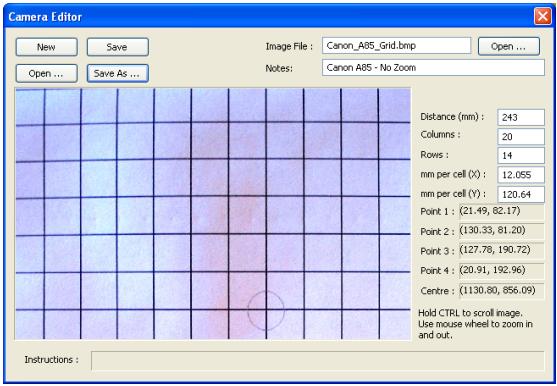
The Save As button should now be enabled, so click it and save the file to the same tutorial directory that we started with.